Installing Gauge
This getting started guide takes you through the core features of Gauge. By the end of this guide, you’ll be able to install Gauge and learn how to create your first Gauge test automation project.
If you are new to Gauge, check out the Overview section in the docs for a quick introduction to the most important features of the tool.
Choose your Setup to Install Gauge
Select your setup to see the instructions for installing gauge.
Installation Instructions
Setup
macOS
JavaScript
VS Code
Step 1: Installing Gauge on macOS
This section gives specific instructions on setting up Gauge in a macOS environment.
(Preferred)
System Requirements
macOS >= Mac OS X v10.6
Homebrew
Commandline tool
Terminal
Install brew, and run the following command
brew install gauge
To check the gauge is installed properly, run the following command, this will show you the version of successfully installed gauge.
gauge --version
You can also use any of these other ways to install Gauge
You can install Gauge by running the following command in Terminal.
npm install -g @getgauge/cli
Install Gauge to /usr/local/bin by running
curl -Ssl https://downloads.gauge.org/stable | sh
Or install Gauge to a [custom path] using
curl -Ssl https://downloads.gauge.org/stable | sh -- --location=[custom path]
Download the Zip Installer and run the following command to complete the installation.
unzip -o gauge-GAUGE_LATEST_VERSION_PLACEHOLDER-darwin.x86_64.zip -d /usr/local/bin
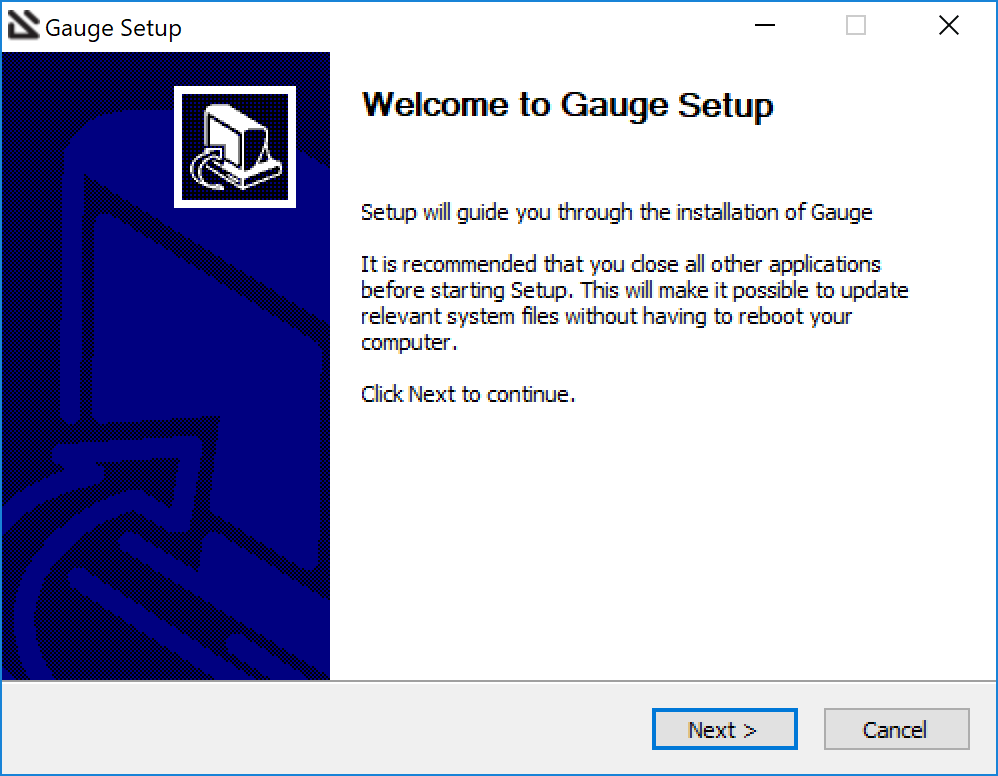
Step 1: Installing Gauge on Windows
This section gives specific instructions on setting up Gauge in a Microsoft Windows environment. You can choose any ONE of the following.
Download the following installation bundle to get the latest stable release of Gauge.
Once you finished installing Gauge, you can go ahead and install the Gauge Extension for VS Code Plugin
For this to work, you will need to install Chocolatey Package Manager. If you have chocolatey installed then all you need to is to follow the steps below, it will download and install Gauge.
Open your Windows Command Prompt as administrator
In Search type, “cmd”
Then click on “Command Prompt”
Type the following command in your Command Prompt to install Gauge.
choco install gauge
Download the following Zip Installer extract it to a location and add it to system path using the following command in Powershell.
Expand-Archive -Path gauge-1.6.35-windows.x86_64.zip -DestinationPath custom_path
To install gauge using NPM you will need the latest node version. You can install Gauge by running the following command in Terminal.
npm install -g @getgauge/cli
Step 1: Installing Gauge on Linux
You can use one of the following ways to install Gauge on your linux distribution
Install Gauge to /usr/local/bin by running
curl -SsL https://downloads.gauge.org/stable | sh
Or install Gauge to a [custom path] using
curl -SsL https://downloads.gauge.org/stable | sh -s -- --location=[custom path]
You can install Gauge by running the following command in Terminal.
npm install -g @getgauge/cli
Download the Zip Installer Extract to a location and add it to system path using the following command.
unzip -o gauge-1.6.35-linux.x86_64.zip -d /usr/local/bin
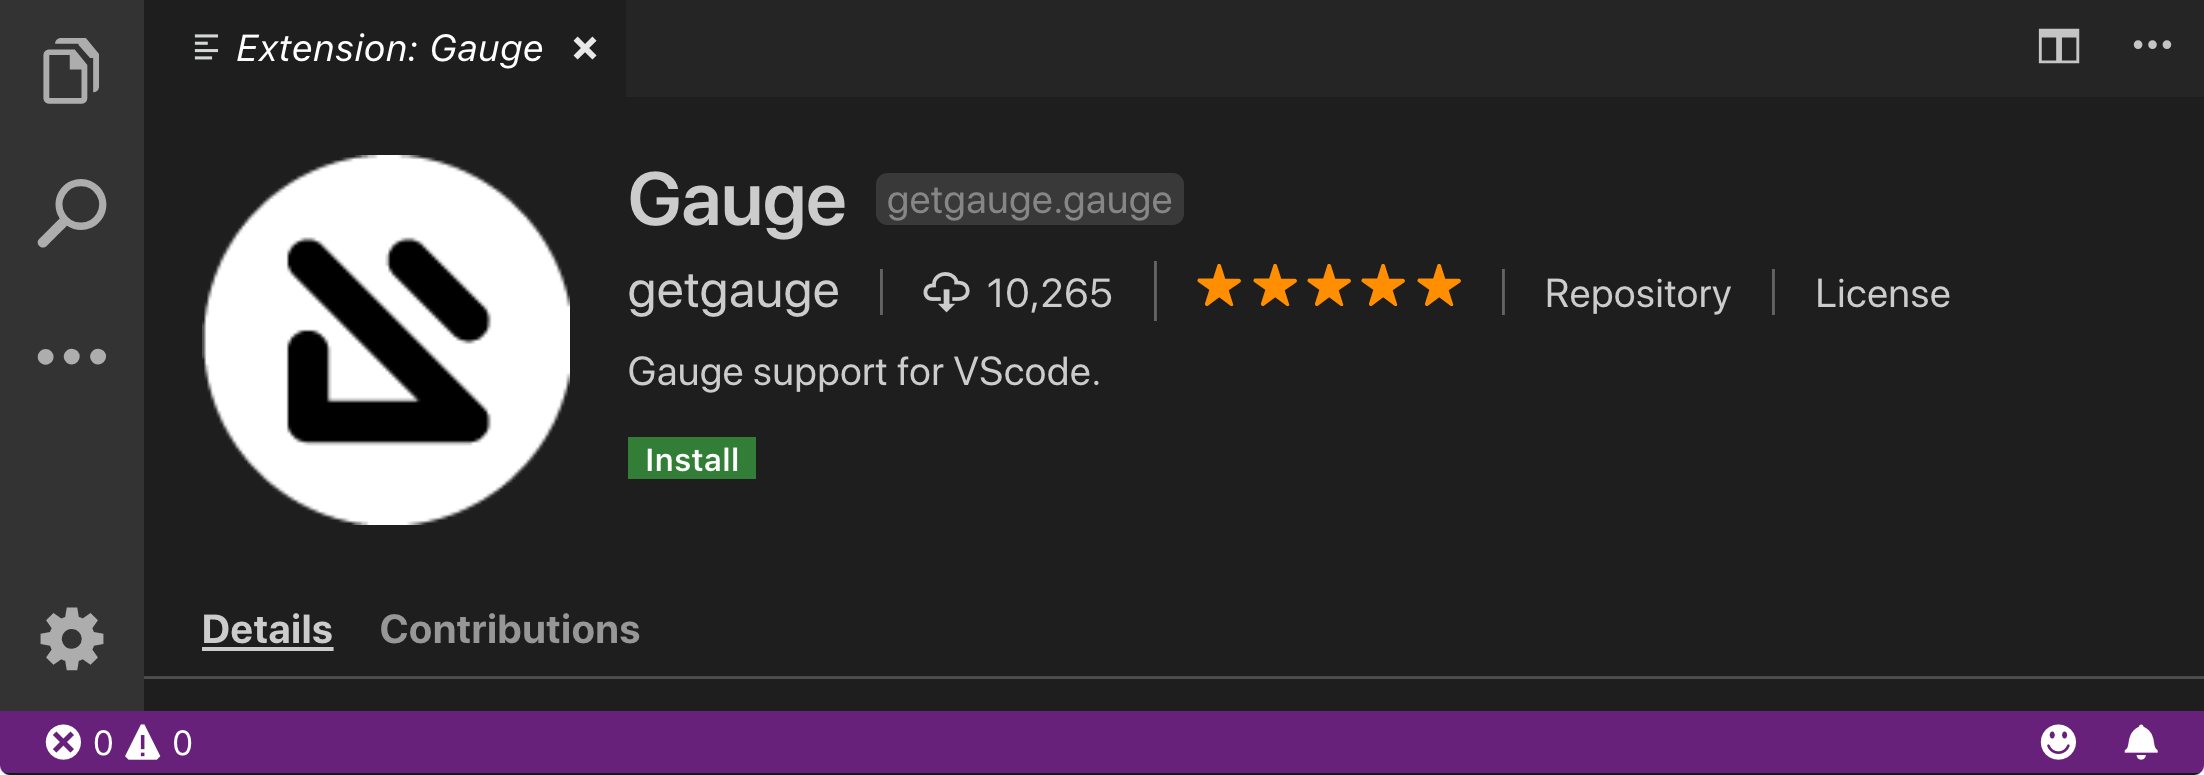
Step 2: Installing Gauge extension for VS Code
System Requirements
Follow the steps to add the Gauge VS Code plugin from the IDE
Note
If you don’t have VS Code installed, you can install it by clicking on Get it now link in the browser popup.
Now that you’ve installed Gauge, you can go ahead and create a C# testing project using Gauge.
Now that you’ve installed Gauge, you can go ahead and create a Java testing project using Gauge.
Now that you’ve installed Gauge, you can go ahead and create a JavaScript testing project using Gauge.
Now that you’ve installed Gauge, you can go ahead and create a Python testing project using Gauge.
Now that you’ve installed Gauge, you can go ahead and create a Ruby testing project using Gauge.